Christmas Presents from Germany & Japan

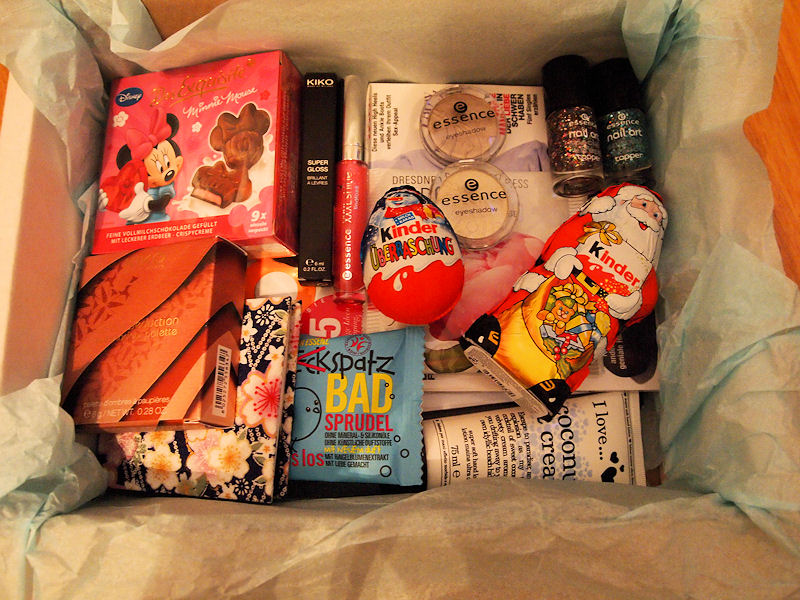
Christmas gifts from Rae, in Germany

Christmas gifts from Miyuki, in Japan

Christmas came a little early for me last week.
I was lucky enough to receive not one, but two packages through the post.
One was from the lovely Rae of Love from Berlin who is an amazing person that I met through blogging.
The other package was from one of my best friends in Japan who I studied with a couple of years ago.
Both gifts were amazing, and so very cool in their own ways.
I loved how both seemed to represent a little bit of the culture too.
Rae sent me some German chocolate (we all know it’s the best), magazines and make-up.
I can’t wait to try out the eyeshadow palette, it’s so very seasonal and the colours are gorgeous!
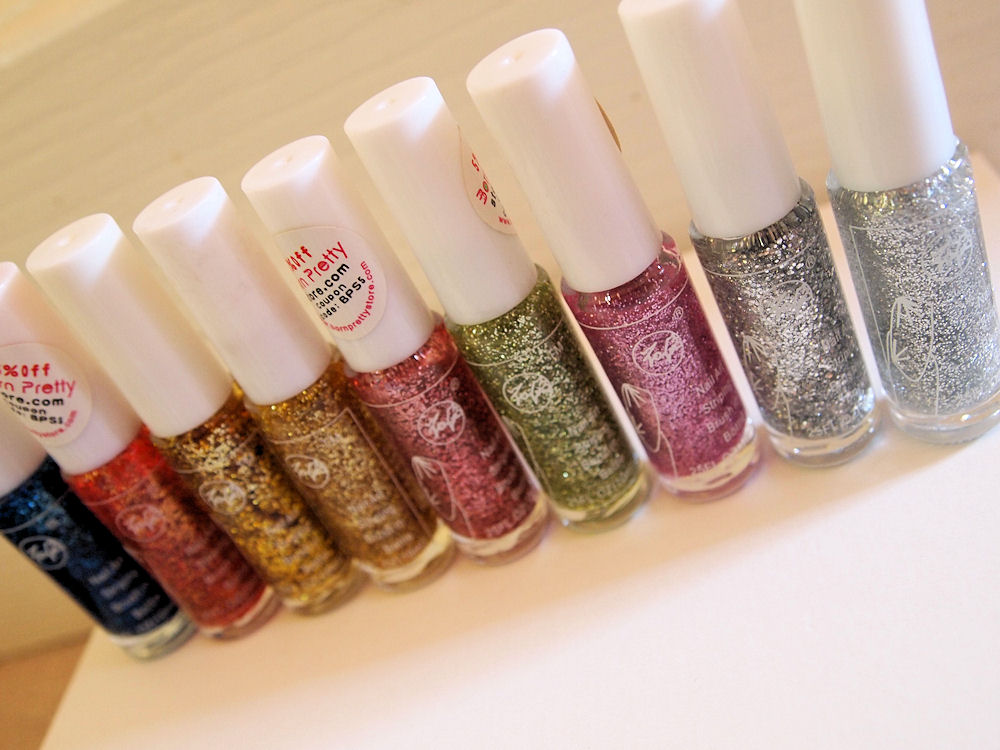
She also knows me very well by including some gorgeous glittery nail polish, which I will have already applied by the time this post goes live. I can’t help it, I’m an addict! 
Miyuki often asks me what I would like and I said I would like to try some new Japanese beauty products.
She also knows that I’ve just moved into my first apartment so sent me a few home items to decorate and relax with.
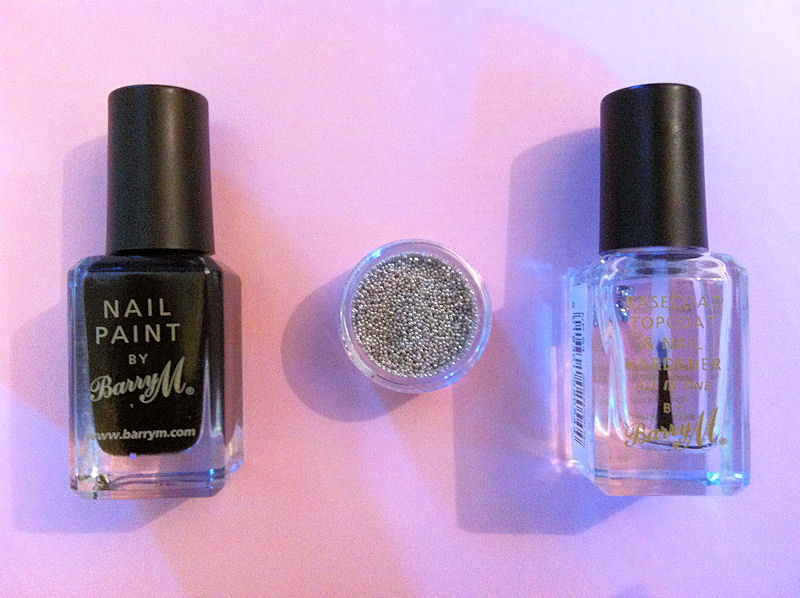
The nail polish, once again was a delight to receive, especially the Majolica Majorca glass polish – review soon!!
I also loved the Dior products and make-up bag. They’ve already been stashed away in my handbag.
I feel so lucky to know such wonderful people and I am very thankful ♥

Review: Joliebox

When I attended the Birchbox champagne afternoon tea event last week I was gifted with a Joliebox.
If you didn’t see that post then you might be confused, but this is because Birchbox have taken over Joliebox.
If I remember correctly the box wasn’t a particular month, it was a mixture of products & previous month’s boxes.
The box contained samples from previous boxes and new items, such as:
Twistband
– RMK Cleansing Balm –
– L’Occitane Angelica Hydration Cream –
– Dr Bronner’s Pure-Castile Soap Pillows –
– Redken Protective Straightening Lotion –
This box was a great way to introduce someone to some of the wonderful brands that Joliebox has worked with.
It also shows you an example of what you might receive in a box; beauty, skincare, hair & lifestyle products, travel essentials, and even full size samples. Birchbox allows you to create a personal profile which your samples will be based on – which is a great feature, I hope they keep it when the takeover happens in January. The magazine is something which is unique to Joliebox and is very popular with a lot of subscribers, so it was nice to receive one with my box.
Joliebox will soon become Birchbox, and is a monthly beauty box service.
For £10 (plus postage) a month you will recieve 4-5 beauty samples to your door.
You can sign up and subscribe here.

Photo Diary: Nail Art

A selection of my recent nail art / nail polish looks
 
One thing I always post on my Instagram is nail art photos.
I don’t do it very often on my blog though, unless I’m posting a tutorial.
So I thought it was about time that I showed off some of my recent nail art/nail polish looks.
Red Gloss & Glitter MixMaxfactor Red Passion & Barry M #np150
Halloween Black & Orange Glitter Gradient Barry M #np147 & bornprettystore glitter pen
Holographic17 holo nail Silver
Black & Gold StudsBarry M #np147, Barry M #np289 & Models Own champagne
Gold ‘Caviar’ Models Own champagne & bornprettystore micro-beads
Black & Gold Studded Barry M #np147 & bornprettystore micro-beads
As you can see I’ve really been favouring glitter polishes again, as well as using studs (micro-beads).
I try to make time to do my nails at least once a week, however sometimes it’s once a fortnight.
I have so many polishes that I would change them more often if I could, but I try to stick with a design.
Do you make time to do your nails every week?
Which one of my recent nail looks is your favourite?

Tutorial: Velvet Nail Manicure

How to create an on-trend velvet nail manicure

The last nail tutorial I posted seemed quite successful so I thought I would do another. This time I picked this season’s on-trend velvet nail manicure – made popular on the catwalk. Once again I’m going for the accent nail as I didn’t want to over do it. So here is a simple and easy tutorial for a velvet manicure.

You will need…
1 x Brush
1 x Tweezers
1 x Base Coat (optional)
1 x Nail Polish (in your choice of colour)
1 x Pot of  ‘Velvet’ Powder (in your choice of colour)

How to create the look:
1. If you’ve chosen to use a base coat, apply it to your nails.
2. Take your chosen nail polish and apply a coat to your nails – wait til dry.
3. Take the ‘velvet’ powder and use the tweezers to mix and separate the powder.
4. Apply another coat of polish on your chosen nails and then shake the powder onto the nails.
4. Leave the powder to set and the polish to dry, then use the brush to brush off any excess powder.
5. A top coat is not needed as it would ruin the effect, and the powder will stay on without it.

And that’s it! As always these are just simple, easy steps that you can use as a guideline when creating this effect. You can always mix it up a bit – maybe do all your nails or even try and create a design with the powder. I would recommend laying down some paper to catch the excess powder – it also makes it easier to put back after. Don’t worry if you get it wet, it may look soggy and ruined but after a quick dry it’s back to normal. This is a very subtle type of nail art, especially in such a dark colour, but I really like it.

The nail polish I am wearing is Natural Collection’s ‘Cosmic Crush’, and the Velvet Flocking Powder* was provided by Born Pretty Store – the tweezers and brush are included with all sales of the (separate) powder.

You can buy the nail polish in Boots and the Powder here (use code: BLOOMZYK31 for 10% discount).

Tutorial: Studded Nail Art Design

How to create a simple studded nail art design

I love nail art but my patience is as long as my skills are good.
Therefore I tend to stick to simple, but effective designs and my favourite way to do this is with an ‘accent nail’.
An accent nail can be one or more nails that stand out from the rest to give your nails that extra bit of glam.
I tend to do one or two, but with this design I felt that less was more. 
So here is a simple & easy tutorial for a studded nail design:
What you will need:
1 x Base & Top Coat
1 x Nail Polish (in your choice of colour)
1 x Container of Micro-beads (in your choice of colour)

How to create the look:
1. Paint your nails with a base coat, your chosen colour and a top coat.
2. Pick your colour of Micro-beads and take a few out of the container.
3. Use the brush of your ‘top coat’ to pick up one of the Micro-beads
4. Place the beads on your finger nail in a random design.
5. Once the beads have been put in place, place a top coat over the nail.
And that’s it!
Of course you can use a separate tool for placing the beads on but I was trying to keep the tutorial simple, with items that most people have or are easily accessible. You could also do it on all of the nails, which I think looks great. 
An edgy design that doesn’t take long to create and still looks chic, and as if you spent a lot of time on your nails.
The nail polish I am wearing is Essie in Stone, and the Micro-beads were provided by Born Pretty Store*.
You can buy the nail polish here and the Micro-beads here (use code: BLOOMZYK31 for 10% discount).

[Nail Week] Review: Glitter Nail Art Brushes


Nail art pens and brushes are some of the easiest ways to create a variety of designs.
I’ve experimented with pens in the past, and I think they’re great but some can be a little awkward to use.
So this time I tried out some glitter nail art brushes, just to see if I could get on any easier with them.
These particular ones come in a set of 9; red-pink, purple, blue, orange, green, 2x gold, 2x silver.
There are two for each silver and gold as one is a thin glitter, and one has bigger pieces.
Please note it is very hard to photograph glitter polish – the effect is much better in person.

Creating a gradient effect with the glitter nail art brushes.

Pros:
+ Easy to use
+ Glitter goes on well
+ Colours are vibrant
+ My favourite colours are orange, blue and gold

Cons:
– Can be slightly gloopy
– Takes time to dry
– Has a VERY strong smell (nail polish chemical smell)

Notes:
I really loved the effect I created with these, but I wonder if I’d be able to create more intricate designs with them.
I think if you want something for simple designs (stripes, gradients, polka dots etc) these are great.
However if you wanted to draw with these then I would say it’s probably going to be difficult, and pens would be a better solution. That said, I thought the glitter went on well and it was easy to apply, especially compared to some of the pens I’ve used. The drying time was slightly longer than a nail polish, which is probably due to the ‘gloopy’ formula. 
You can buy these Glitter Nail Art Brushes here.
Or browse BornPrettyStore for other colours in the range.
10% off with code: BLOOMZYK31

[Nail Week] Review: Ylin Colour Changing Nail Polish


Here is the next post from ‘Nail Week’, introducing a colour changing nail polish!
This probably sounds like a bit of a gimmick, but I was seriously impressed with it.
I haven’t been a fan of the cracked polish & magnetic polish looks, so this is my fad of the Summer.


As you can see from the photos above the nail polish changes colour when exposed to different temperatures.
At room temperature the nail polish has a nice gradient effect to it – this bottle is a blue base with purple gradient tips.
When it’s warm (see circled nail) the polish reverts back to blue and finally when it’s cold the polish changes to purple – I only placed the tips of my fingers in the freezer to quicken the process, that’s why it’s more of a gradient in the photo.
Oh, and don’t worry about the white dot on one of the nails – I caught it when applying the polish.
Pros:
+ I loved the gradient effect
+ Opaque in one coat
+ Fun and a bit of a party trick
Cons:
– Matte finish
– You don’t have much control over how/when the colour changes
Notes:
It is a novelty, but I found it fun to wear a colour changing nail polish.
The fact that you can achieve a simple gradient effect without having to spend hours on your nails, or use various sponges etc. is worth buying this polish alone. Of course depending on the temperature you don’t have much control over the look of your polish, but I didn’t find that too bothersome, actually it was quite fun checking up on my nails during the day to see if they had changed. As for the matte finish, I felt a bit sad about that, but I guess it’s down to the formula.
The price isn’t too bad either at around £5 (with free shipping).
ETA: Yes, a glossy topcoat can be applied and it will still change colour. I did it with a Barry M topcoat.
You can buy the blue/purple Ylin Colour Changing Nail Polish here.
Or browse BornPrettyStore for other colours in the range.
10% off with code: BLOOMZYK31