Tutorial: DIY Marble Table

diy-marble-table-tutorial-vinyl-contact-paper-bloomzy-5

diy-marble-table-tutorial-vinyl-contact-paper-bloomzy-7

It’s been a while since I did a tutorial post; but what’s more of a shock is that this time it’s a homeware tutorial. Yes, you may have noticed by my incessant Instagram posts that I too have jumped on the marble bandwagon. However I knew that at some point decorations would no longer do. That eventually I would turn into a decor-obsessed monster. Well that day has come ladies and gentleman, and I knew I had to do something about it. No I will not be aimlessly wandering the streets of East London, rambling about marble and Pinterest tutorials to anyone who will listen. Instead I remembered something from my childhood – the old style marble contact paper/vinyl you could buy in homeware stores (que horrific memories of being dragged around B&Q by my parents). So I got on eBay and decided I would finally spruce up the table I use for my product photos…and here’s my resulting tutorial: How to create a marble table for under £20, in only 5 steps!

What do you need?
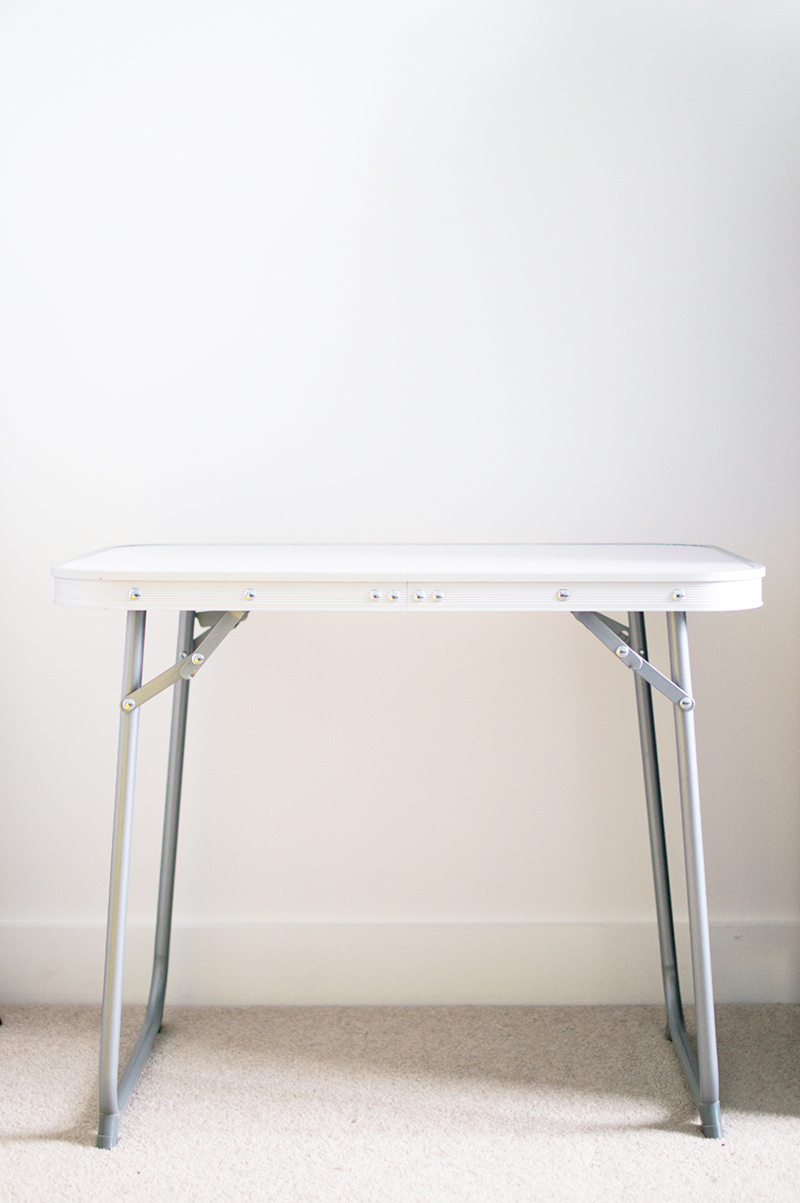
Table – I bought mine from Argos (£14.99)
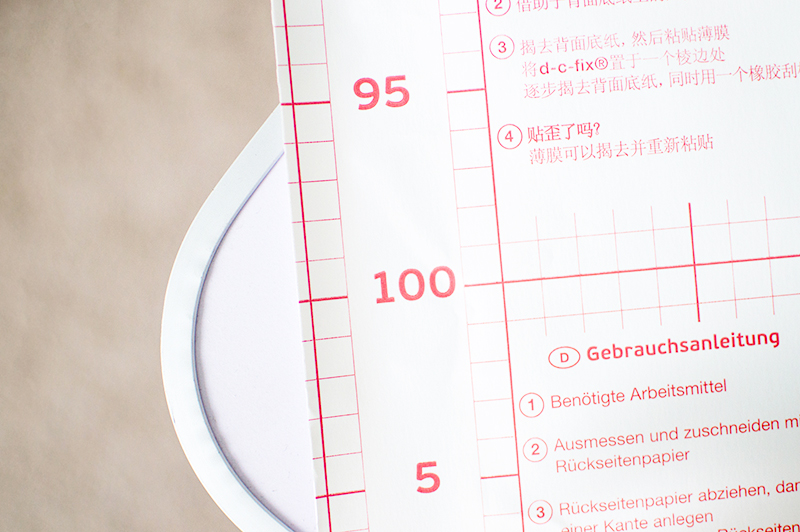
Marble Contact Paper – eBay (£4.99)
Soft clean cloth
Scissors
Ruler

How to make it:
1. Clean the surface of the table.
2. Use the ruler to measure the diameter of the table.
3. Use the grid on the reverse of the contact paper to measure and cut to size.
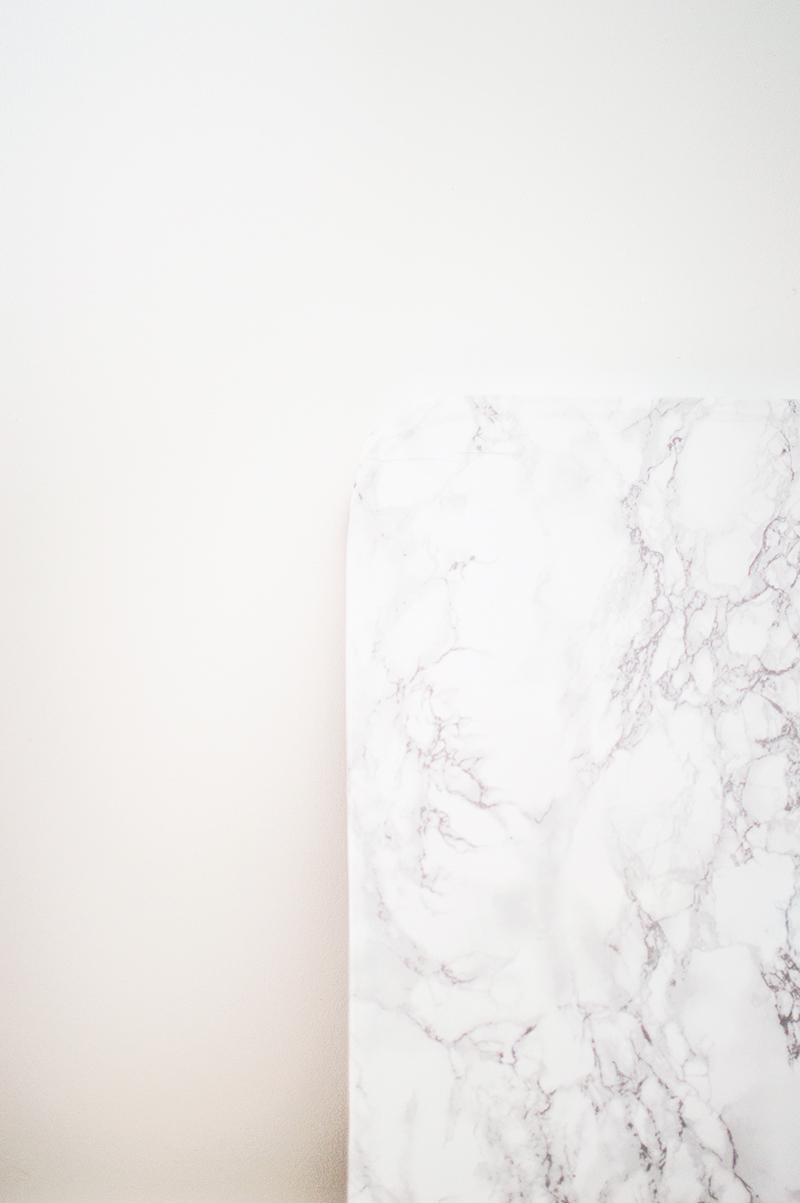
4. Peel off some of the back paper and put it along one edge of the table.
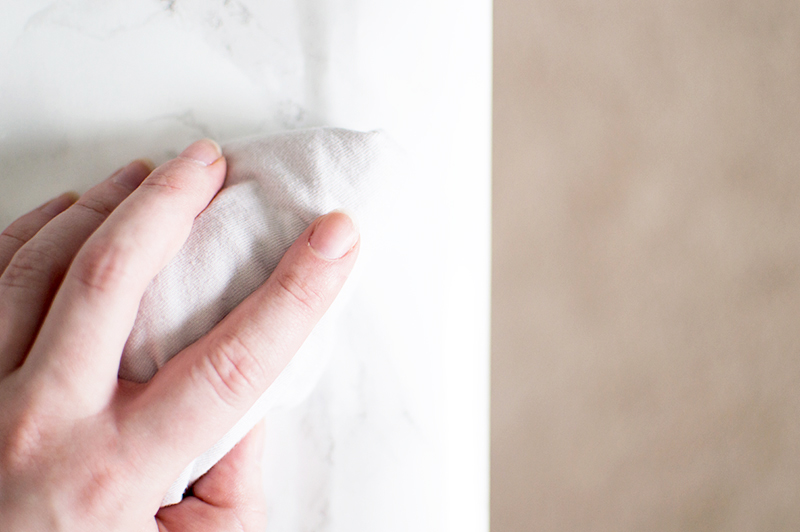
5. Use the soft cloth to gently apply pressure to the paper. Slowly peel off the rest of the paper little by little, continuing to apply pressure as you go along.

The great thing about contact paper/vinyl is that you can always peel it off if you make a mistake (or if decide that you don’t like it). You could also use the leftover to cover your laptop or phone case…or anything else you can get your hands on.

Good luck!

diy-marble-table-tutorial-vinyl-contact-paper-bloomzy-4

diy-marble-table-tutorial-vinyl-contact-paper-bloomzy-3

diy-marble-table-tutorial-vinyl-contact-paper-bloomzy-2

diy-marble-table-tutorial-vinyl-contact-paper-bloomzy-1

diy-marble-table-tutorial-vinyl-contact-paper-bloomzy-8

diy-marble-table-tutorial-vinyl-contact-paper-bloomzy-6

Tutorial: How To Remove Any Nail Polish Easily

I often get friends and readers asking me how I remove my nail polish so easily. The trick I use is one I learnt years ago from a friend, and I actually thought it was well known. People still seem surprised and thankful when I tell them though so I thought I’d make a tutorial.
You will need:
A sheet of tinfoil
A pair of scissors
A couple of cotton pads
1 x bottle of nail polish remover
A Step by Step Guide


1. Cut 5 thin (nail width), long strips from the tin foil.
You’ll only need 5 as you can re-use them on the other hand.
 
2. Cut the cotton pad so you have 10 nail size pieces.


3. Soak a cotton piece in nail polish remover, and squeeze off the excess.


4. Place the cotton pad on your nail and wrap the tin foil around it, and repeat for each nail.
Make sure you fold the tin foil at the tip, so it’s secure and won’t come off.


5. Leave these on for around 5 minutes for regular polish, and 10 minutes for glitter.
Times may vary depending on the polish, but I find these usually work fine.


6. Once removed you’ll have polish-free nails, and can start on the next hand.
With more stubborn polish a little may be left around the edges.
You can easily remove this though by using the cotton pad to wipe it away.
 
7. Wash your hands free of any nail polish remover and use a hand cream.
Make sure to pay attention to your nails and rub the cream in around the cuticles.
 
There you have it, my super easy nail polish remover tutorial. I have yet to meet a polish that doesn’t remove with this method. This wipes away even the most stubborn glitter nail polishes.
Have fun!

Tutorial & Review: Collection Eyebrow Kit

Collection Work The Colour Eyebrow Kit*

My eyebrows haven’t seen the light of day since I was about 10 years old. Due to having a full fringe (and loving it) I’ve never bothered with primping them either. For me, there just doesn’t seem much point. Did I just revoke my beauty blogger membership? Well Collection, and a wonderful MUA by the name of Francesca Neill, were about to change all that. Phew! Now you can stop screaming at your computer screen and wondering what’s wrong with me. Seriously though, if you’re like me and don’t want to touch your naturally gorgeous brows, don’t worry about it!

Collection will be releasing their new Eyebrow Kit in April, and I thought I’d show you how it works. I took inspiration from Francesca, who showed us how to use the kit at the Collection S/S 14 press day. It’s pretty simple and everything is laid out for you, making it super easy for a beginner like me to use it. I found that the shadow stayed on my brows all day and kept the shape and style after using this little kit. The shadows have are highly pigmented but blend well. Francesca even recommended paler ladies use the lightest shade for contouring – and she used it on me to show me how it would work. So if you want perfect brows in just a few easy steps, take a peek below and you’ll find out why this is for you! Please note I am a complete beginner so this is a very simple tutorial to show how the kit works, and to help anyone else out there who may want to have a go.


1. Use the angled end of the brush to apply the darker shadow to the middle/outer part of your brow.

2. Whilst still using the angled end of the brush, apply a lighter shade to the inner part of the eyebrow.

3. Use the other end of the brush to blend the shadow together and, if needed, to help shape the brow.

4. Finally use the clear brow mascara to define the brow and lock the look in place.

This can be done to match the natural shape of your brow, or to create a more angled & defined look. You can also use the clear brow mascara separately on your untouched brows, to define and shape them. It’s also important to remember that you should use the shadow/s best suited to your natural brow colour.

Collection’s Eyebrow Kit will be available from 9th April in Boots and the 16th April in Superdrug for £3.99.

Review & Nail Art: Mavala

Mavala Spring Trend Nail Polish*
You guys know how obsessed I am with nail polish by now.
So I was very happy to receive these lovely spring shades by Mavala, a Swiss brand.
I’ve not tried the brand before but have heard good things and I completely agree with those views.
The bottles, although small, hold quite a bit of polish.
I prefer to do a couple of coats myself but really only one is needed with these.
I was actually very surprised at how opaque it was, as I thought the shades would make it difficult.
The colour of the polishes themselves are very pastel & spring like, but I still felt they were quite vibrant.
I was inspired by Mavala’s nail art for Holly Fulton’s S/S 13 Collection and tried out my own nail art.
I used:
1. Manicure Stickers
2. Mavala Polish in Lemon Cream
3. Mavala Polish in Lagoon
4. Mavala Polish in Aquamarine
5. Mavala Polish in White
I used the White as a base for my nails, and then once it had dried, placed manicure stickers over top. I did this is several different ways so that no nail was the same. Then I took my polishes and painted over top of the white, making sure to only paint over part of the nail and stay within the border of the manicure stickers. I think the final result wasn’t too bad.
I’ve never been much of a fan of white nail polish but I didn’t mind this one paired with other colours.
I still don’t think I would wear it alone but I would definitely layer it with a glitter polish or other shades.
The polish applied easily, and very well and was opaque with just one coat.
The Mavala Spring Trend Shades will be released later this month.
You can purchase them from various UK stores, find your nearest here.

My 'Everyday Hair' Routine

Before Christmas I was gifted with this lovely ghd Style & Protect Gift Set.
I was then asked to create a post where I incorporated the products into my routine.
Luckily all the products are items that I would use in my everyday look.
What I use:

4. ghd Hair Clips (included in the set)
6. Hair Dryer
Step One:
I give my hair a spritz with the straight and smooth spray, and work it through my hair.
This helps to straighten & smooth my hair, whilst protecting it from the heat from my dryer & straighteners.
You can also use the spray in between washes to help protect against heat.
Look at that post-shower fresh face!
Step Two:
Grabbing the paddle brush I gently detangle my hair (if needed).
Then using my hair dryer and the brush together I blow dry my hair straight.
This is always a challenge as one side usually comes out straighter than the other.
Step Three:
After drying my hair, I use the clips to separate parts of my hair, ready for straightening.
My hair isn’t particularly thick, but I do have layers so this makes it easier.
I then grab my go-to ghds and start straightening! 
Sometimes I curl the ends under, depending on the look I want.
Step Four:
If I feel like it, I take the ghd Final Shine spray and pop a little on my hair.
It isn’t too heavy and it helps to add a little extra shine, whist keeping away bits of frizz.
Instead of spraying this directly onto my hair (you can!) I spray into my hands and work through my hair.
Step Five:
After a little styling with the brush, I’m done!!
My ‘everyday hair’ routine may not consist of much but it works for me.
I love ghd as a brand and these products make my routine so much easier.
It was so much fun creating this hair tutorial!
I’m currently growing my hair out (again!) so look out for more in the future.
You can purchase all of the products shown at the ghd website – check out hairstyles by ghd for inspiration.

Tutorial: Velvet Nail Manicure

How to create an on-trend velvet nail manicure

The last nail tutorial I posted seemed quite successful so I thought I would do another. This time I picked this season’s on-trend velvet nail manicure – made popular on the catwalk. Once again I’m going for the accent nail as I didn’t want to over do it. So here is a simple and easy tutorial for a velvet manicure.

You will need…
1 x Brush
1 x Tweezers
1 x Base Coat (optional)
1 x Nail Polish (in your choice of colour)
1 x Pot of  ‘Velvet’ Powder (in your choice of colour)

How to create the look:
1. If you’ve chosen to use a base coat, apply it to your nails.
2. Take your chosen nail polish and apply a coat to your nails – wait til dry.
3. Take the ‘velvet’ powder and use the tweezers to mix and separate the powder.
4. Apply another coat of polish on your chosen nails and then shake the powder onto the nails.
4. Leave the powder to set and the polish to dry, then use the brush to brush off any excess powder.
5. A top coat is not needed as it would ruin the effect, and the powder will stay on without it.

And that’s it! As always these are just simple, easy steps that you can use as a guideline when creating this effect. You can always mix it up a bit – maybe do all your nails or even try and create a design with the powder. I would recommend laying down some paper to catch the excess powder – it also makes it easier to put back after. Don’t worry if you get it wet, it may look soggy and ruined but after a quick dry it’s back to normal. This is a very subtle type of nail art, especially in such a dark colour, but I really like it.

The nail polish I am wearing is Natural Collection’s ‘Cosmic Crush’, and the Velvet Flocking Powder* was provided by Born Pretty Store – the tweezers and brush are included with all sales of the (separate) powder.

You can buy the nail polish in Boots and the Powder here (use code: BLOOMZYK31 for 10% discount).

Tutorial: Studded Nail Art Design

How to create a simple studded nail art design

I love nail art but my patience is as long as my skills are good.
Therefore I tend to stick to simple, but effective designs and my favourite way to do this is with an ‘accent nail’.
An accent nail can be one or more nails that stand out from the rest to give your nails that extra bit of glam.
I tend to do one or two, but with this design I felt that less was more. 
So here is a simple & easy tutorial for a studded nail design:
What you will need:
1 x Base & Top Coat
1 x Nail Polish (in your choice of colour)
1 x Container of Micro-beads (in your choice of colour)

How to create the look:
1. Paint your nails with a base coat, your chosen colour and a top coat.
2. Pick your colour of Micro-beads and take a few out of the container.
3. Use the brush of your ‘top coat’ to pick up one of the Micro-beads
4. Place the beads on your finger nail in a random design.
5. Once the beads have been put in place, place a top coat over the nail.
And that’s it!
Of course you can use a separate tool for placing the beads on but I was trying to keep the tutorial simple, with items that most people have or are easily accessible. You could also do it on all of the nails, which I think looks great. 
An edgy design that doesn’t take long to create and still looks chic, and as if you spent a lot of time on your nails.
The nail polish I am wearing is Essie in Stone, and the Micro-beads were provided by Born Pretty Store*.
You can buy the nail polish here and the Micro-beads here (use code: BLOOMZYK31 for 10% discount).