Flower Arranging with Marks & Spencer

Flower ArrangingFlower Arranging with Marks and Spencer

Flower arranging has always been an enchanting mystery to me. When I was younger my grandmother would always have beautiful bouquets of flowers scattered throughout her house. All of which she had arranged herself. It looked so simple, but no matter how hard I tried I couldn’t recreate it myself. In more recent years – after moving into my own apartment – the allure of fresh flowers has grown. However without any knowledge of how to arrange flowers, I was at a loss. Enter Marks and Spencer, their flower expert Simon Richards, and a special flower arranging class they set up for an intimate group of bloggers.

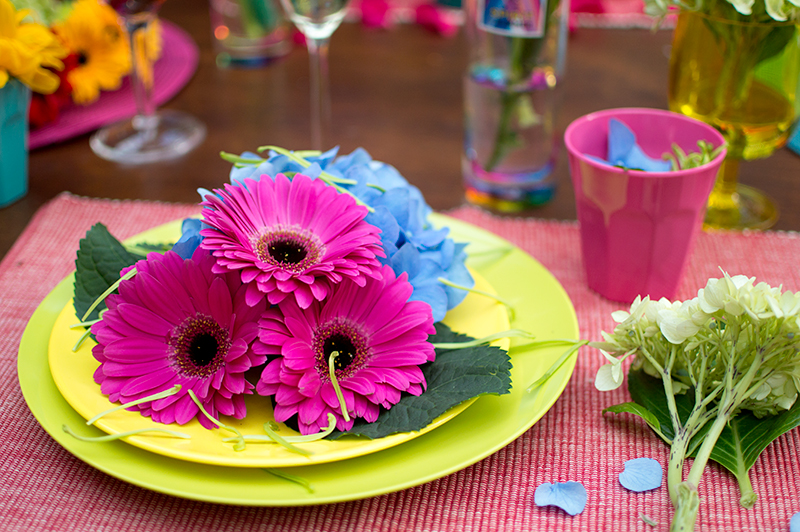
Flower Arranging Tip 1: Carnival of Colour

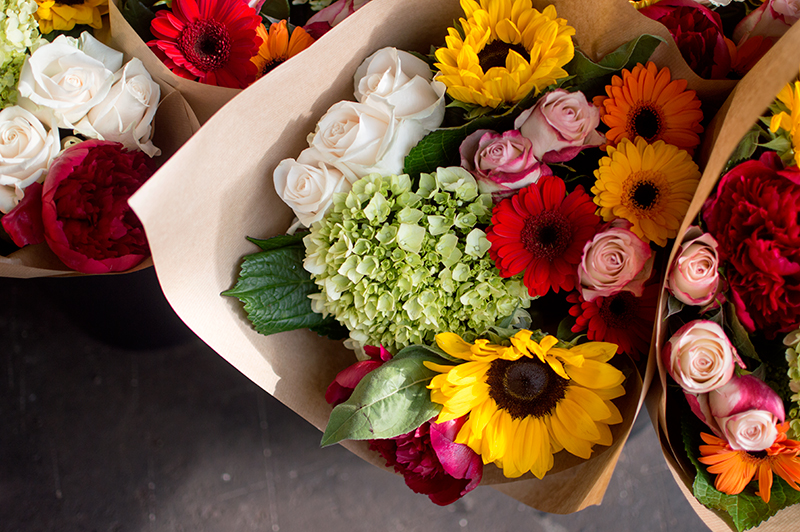
For their stand at Chelsea Flower Show this year, Marks and Spencer created their own carnival of colour. Reflecting on this, Simon’s first tip was all about adding colour to your patio, garden party, bbq, dining table etc. We were shown how to add colourful arrangements to our tables, with flowers such as peonies, sunflowers and more. The great thing about this style of arrangement is that there are no real rules. Pop them into bowls, glasses, onto plates. Scatter them across the table. Basically have your way with them.

Simon Says- have fun with colour, and be spontaneous!

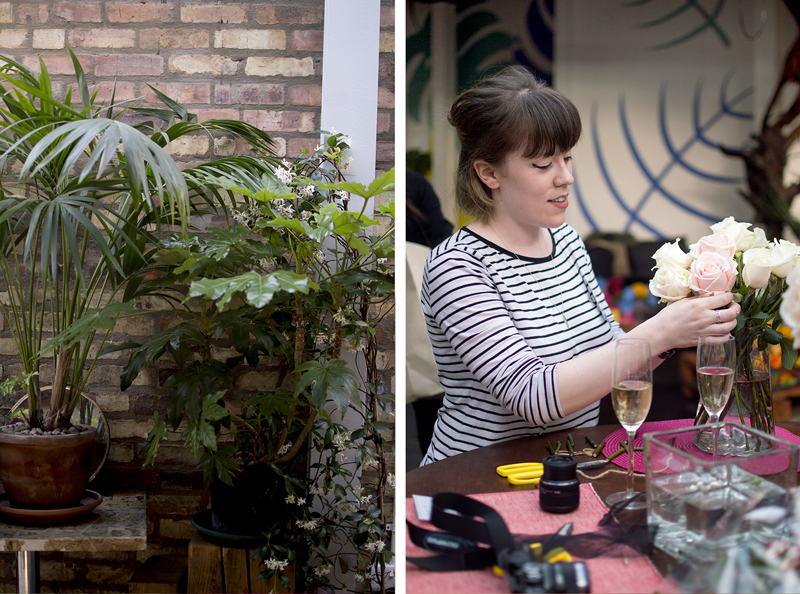
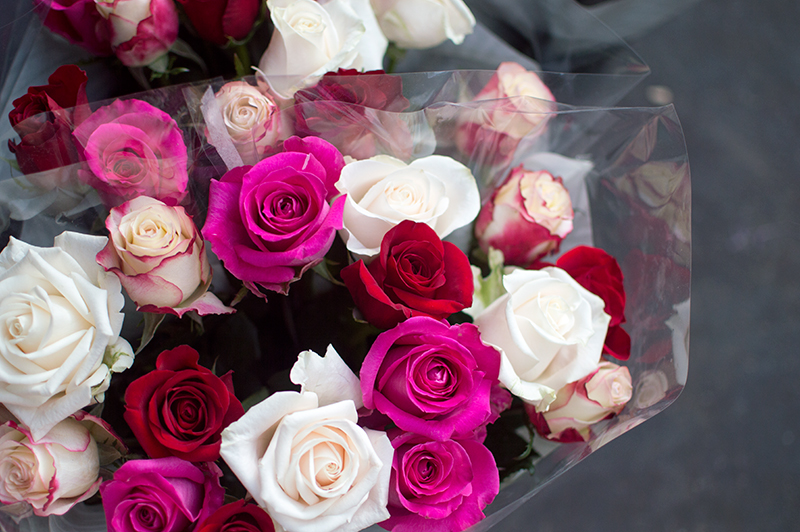
Flower Arranging Tip 2: Roses/Bouquets

Next, Simon gave us tips on how to arrange the perfect hand-tied bouquet, and he did so with everyone’s favourite – the rose. Roses are a classic. No one can turn their noses up at a well groomed bouquet of roses, right? I’d had my eye on the cream and dusky pink roses all evening, so I was very excited for this tutorial. We were shown how to create an even bouquet. Starting with one flower in the middle, hold the stems around 1/3 of the way down with one hand, and gradually add flower-by-flower in a “fanning” technique; slowly rotating them as you go. Afterwards, simply wrap your ribbon/twine around the bouquet – whilst still holding it in the same place – and secure.

You can find some of the roses we used for our arranging here.

Simon Says – fan out/rotate your flowers as your add them to the bunch!

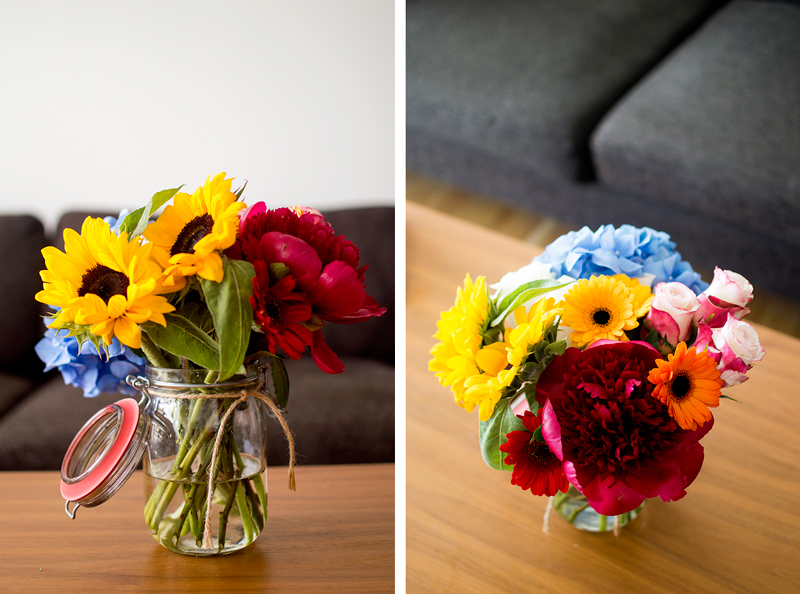
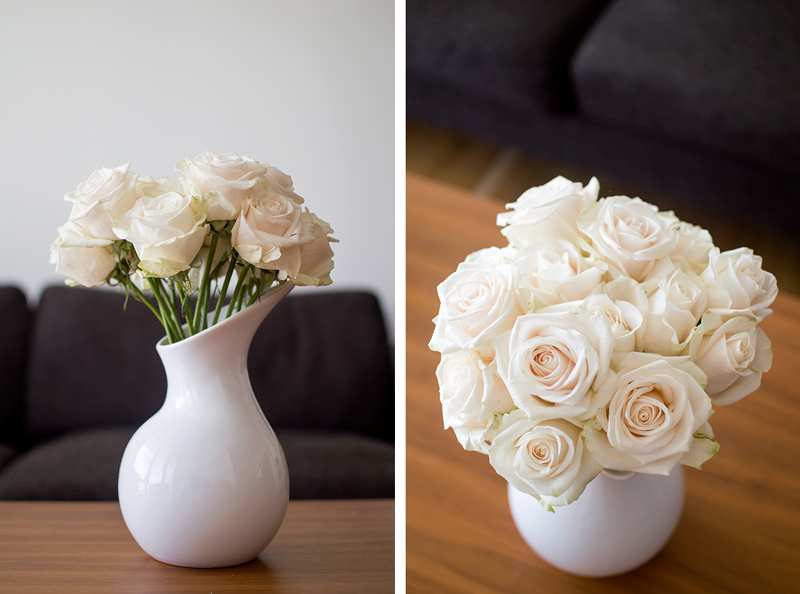
Flower Arranging Tip 3: At Home

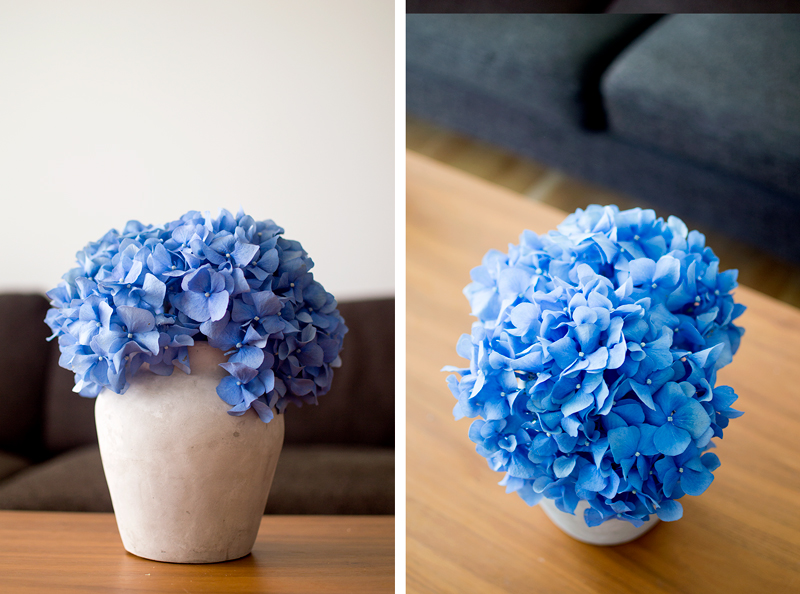
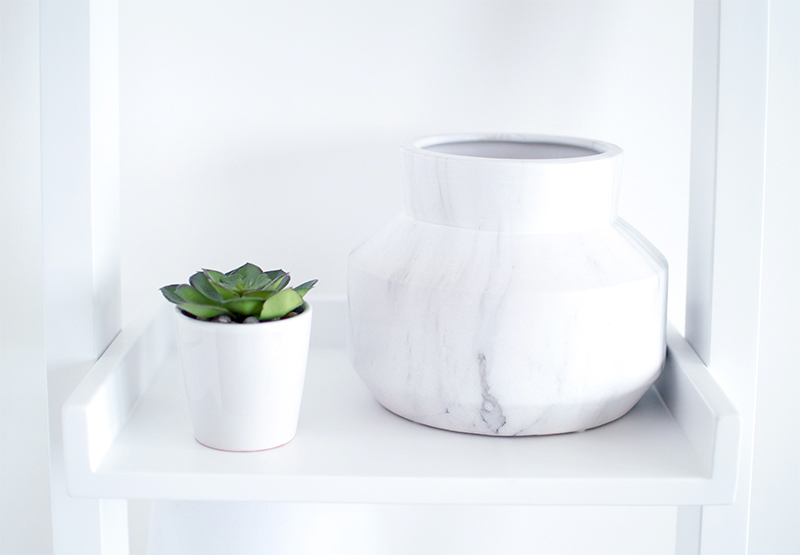
Of course what we all want to know is how do we integrate this into our homes. They key thing here is to find a fitting vase. This could be any shape or size, as long as it fits into your interior. That said, different flowers will often look better in different types of vase. Tall, thin vases work better with a minimal amount of flowers. Whereas wider lipped vases look much nicer with large bouquets, and big blooms. I myself prefer a shorter, wider vase, which works with a variety of flowers.

Simon Says – for a contemporary look, choose a short, round vase!

Check out more photos from the event, and my attempts at flower arranging at home below.

——————————–


This post is in collaboration with Marks & Spencer however all views, photos and words are my own.


Flower Arranging Flower Arranging Flower Arranging Flower Arranging Flower Arranging Flower Arranging Flower Arranging Flower Arranging

A Minimalist Home, with Amara

Minimalist HomeA Minimalist Home, with Amara

It’s been exactly one year since we moved into our new bigger and brighter apartment. It’s fair to say that not only has my housing situation changed, but so has my mentality. My old apartment left little room for furniture, let alone imagination. So we made a pact. We would furnish it how we wanted, and turn this new apartment into a home.

Of course it isn’t easy, nor cheap to furnish an apartment so we have taken our time and bought pieces throughout the year. It’s fair to say that we’re at a stage where we’re around 90% happy. Ben wants more plants, and I’m after some more stylised kitchenware. However recently we thought about the addition of some practical, design items to our shelves. That’s where Amara came in!

Purchases for a Minimalist Home

The process of ordering with Amara was an easy one. The hard part was deciding on what items to buy. We definitely knew that we wanted a new clock (after ours suffered a slight injury), and bookends. However the rest just “fell” in my basket. The speaker was a logical purchase; I love my bluetooth headphones from Kreafunk, so I knew their speakers would be good quality…as well as effortlessly stylish. As for the trays, well I’ve been eyeing up the apricot and grey HAY trays since my trip to Berlin. They concept of the trays is simple: they work as an interlocking puzzle, made up of five different colour ways and shapes. Whichever you buy, they will fit into one another. It makes for a great bit of design.

I’m really happy with all of our purchases from Amara. Thanks to the “shop by room” feature it was easy to find what I wanted…and those little extras I didn’t know I wanted until I found them. Amara doesn’t only offer accessories for the home though, they have pretty much everything ranging from furniture, to kitchenware and technology. The range of prices is fair, and the variety of designers and brands is enough to suit anyone’s tastes. I hope to make space for an office of some sorts soon, and when I do, I know where my first stop will be!

——————————–
This post is in collaboration with Amara however all views, photos and words are my own.
 Minimalist Home Minimalist Home Minimalist Home Minimalist Home Minimalist Home Minimalist Home

In The Window with Waffle Design | Lifestyle

waffle designIn The Window with Waffle Design, at Sugarhouse Studios

As soon as I stepped in front of Sugarhouse Studios, I knew I was in for a creative evening. The space houses a variety of designers and artists. However on this particular evening I was there to see Waffle Design, courtesy of In The Window. You may remember my previous visit to Daniel Heath’s studios, where I screen printed my own wallpaper. I enjoyed the insight into the designer’s world so much that I knew I had to attend the next event. Thankfully I didn’t have to wait too long.

Who and What…?

Founded by Ciara, Waffle is a fresh range of organic cotton, home interior accessories using a tactile waffle weave. Using a non-trend orientated colour palette, Ciara aims to create timeless pieces that will fit into anyone’s home. Her creations are simplistic, but never basic.

The Creative Process…

After catching up with my fellow bloggers over some delicious snacks, we were given a tour of the studio by Ciara herself. She talked to us about her design process, and what inspired her to start the company. I was inspired by not only her technique, but her impressive use of colour. One other thing I picked up on whilst wandering around her studio, was that all of her designs seem so effortless. Even so, I could tell that a lot of hard work and love had gone into each piece.

After our tour we were given the chance to create our own woven pouch, using Ciara’s method of choice. I chose a colour palette of dusky pinks and greys, something I felt reflected Waffle design and my own personal taste. Ciara was such a good teacher, that I barely needed to ask for advice. It took us around 30-40 minutes to finish our designs; clearly we weren’t experts yet. Even so time flew by as we relaxed and focused on our pieces. Afterwards Ciara finished off our pouches for us and added her signature tag.

Thanks to Waffle Design and In The Window

I learnt a new skill, whilst getting to know one of my favourite designers from In The Window. I was inspired by Ciara’s work, and her approach to design. I never really think of myself as a creative person, but meeting designers and finding out more about their pieces is incredibly inspiring to me. It pushes me to find out more about the products I buy, and the story behind them. Not only that, but it inspires me to be more productive in my own work.

You can find out more about Waffle Design, at In The Window.
Follow #LiveTheStory on Twitter and Instagram to find out more.

(Photos of me are courtesy of In The Window)

waffle-design-3 waffle-design-4 waffle designwaffle-designwaffle-design-1 waffle-design-2 waffle-design-5waffle design

2 Lovely Gays x Secret Linen Store Collection

2 lovely gays2 Lovely Gays Collaboration with Secret Linen Store

I love when I get an invitation to a press event that’s a little out of the ordinary. A slumber party…in an interior designers house? Where do I sign up?! Ok so the “slumber party” was more of a concept, than an actual sleep over. I knew that. I totally didn’t re-read the email 3 times and remove my silky pyjamas from my bag…

In all honesty though, I was pretty excited to be invited to the release of 2 Lovely Gays (2LG for short) new bed linen collection, in collaboration with the Secret Linen Store. The fact that the event was at their house was even cooler. I’ve always loved diving into magazines and seeing what interior designers homes look like. I mean if someone is gonna get it right, it’s gonna be them, yeah? Well I was right, because as soon as I stepped into the 2LG’s home, I was in awe of the sheer style that played out in front of me. Everything was effortlessly arranged, and there was a flow that moved throughout the house, linking each room to the other. Basically I wanted to move in straight away!

But what about the 2 Lovely Gays x Secret Linen Store Collection?

There are 3 sets in the collection:

All of the sets look gorgeous and feel lovely – these would be so wonderful to cuddle up in on a cold Sunday morning. Each set has a story behind the design, which makes them feel that little bit more special. My personal favourite story was about a sweet old lady called Mary – who used to live in 2LG’s house – and is now the namesake for one of the sets. It makes the sets feel like you own something personal, and unique. A nice touch.

However stories aside, the Moon Bed Set is my favourite by far. It’s everything I look for in a duvet set: a high thread count (260), quality cotton (50% Egyptian), affordability, and a contemporary-minimalist design. I plan to buy the set when I get back from my travels next month, because I just can’t stop thinking about it.

You can check out the full collection online, at Secret Linen Store.

2 lovely gays 2 lovely gays 2 lovely gays 2 lovely gays 2 lovely gays 2 lovely gays 2 lovely gays

A Minimalist Haven at Home

dwell-homeware-home-decor-interior-white-minimalist-office-space-work-bloomzy

Moving home means many things, but probably the most exciting is making a fresh start. I’ve always loved bright open rooms, but unfortunately our last apartment was small and dark. So when we were looking for a new apartment we kept this in mind. Luckily for us we found something pretty special. That meant I was finally able to decorate with one particular item that I’d always wanted, but never been able to justify – a ladder shelf. I’ve always loved how chic and minimalist ladder shelves are. They offer a space to display some of your more decorative pieces, without making things look cluttered.

Being able to see something in-store is far better than viewing it online, obviously. So I popped by Dwell’s Westfield store to see the shelf, and a few other items:

I picked up the lamp, vase and espresso cups in-store, although I was told I would have to wait for the shelf unit, as they are kept at the warehouse. The ordering process with Dwell was pretty easy. I did it right there and then in-store, and arranged to have it delivered to the same location that week (home delivery is also available). When the delivery day came I received a call stating that there were problems with the truck, and that it would be in by the end of the week instead. Sure enough I received a phone call on Friday evening to say it was ready for collection.Even with the small hiccup, everything went smoothly. I’m incredibly happy with our new space, and we’ve had so many compliments on it from friends and family. Slowly and surely our apartment is turning into the minimalist haven I have always dreamt of.

——————————–
This post is in collaboration with Dwell but all views, photos and words are my own.

dwell-homeware-home-decor-interior-white-minimalist-office-space-work-bloomzy-2-copy

dwell-homeware-home-decor-interior-white-minimalist-office-space-work-bloomzy-1-copy


Time for a Spring Clean

george-asda-homeware-lifestyle-home-interior-desk-lamp-copper-bronze

george-asda-homeware-lifestyle-home-interior-bed-duvet

george-asda-homeware-lifestyle-home-interior-alarm-clock-copper-bronze

Spring may be my favourite season, but I don’t enjoy the inevitable small talk topic of Spring cleaning. I dislike clutter so I spend most of my year tidying up and keeping things as minimal as possible – I truly believe that it helps keep my head clear also. However after starting my new job last year, I’ve found that I don’t have as much time as I used to. I knew that the move to the new apartment was going to be a great excuse to do a big overhaul of all our stuff. Of course that also means investing in new pieces. Luckily for me, George at ASDA offered me a small budget to deck out our new bedroom with.

Honestly George isn’t the first brand I think of when I want to buy new homeware. However after browsing the site I realised that they carried a lot of on-trend products (like these copper items), for very reasonable prices. Soon enough I had chosen everything and it was on it’s way. Here’s a quick rundown of what I ordered:

The main items were a dresser, lamp and a rug, with some items of bedding, and several decorative bits to scatter around the room. The dresser wasn’t the easiest to put together, but thankfully the rug and lamp did their own thing. The bedding was all very good quality. We went for the full shebang: duvet, memory foam pillows, soft pillows, bed sheets and a duvet cover set (I couldn’t resist that green). As for the decorative items, well they just look great anywhere. The Yankee candle smells lovely, and the one we popped next to the bed is scent-free – so no sniffling during the night!

I have to say that we’ve been sleeping really well, and I am usually a very light sleeper.  I’ve also found myself sneaking away to the bedroom to blog, whilst I lounge on the bed. I think it’s fair to say that our bedroom has now become a bright, attractive space for us to relax in. Mission success!

——————————–

This post is in collaboration with George at ASDA but all views, photos and words are my own.

Tutorial: DIY Marble Table

diy-marble-table-tutorial-vinyl-contact-paper-bloomzy-5

diy-marble-table-tutorial-vinyl-contact-paper-bloomzy-7

It’s been a while since I did a tutorial post; but what’s more of a shock is that this time it’s a homeware tutorial. Yes, you may have noticed by my incessant Instagram posts that I too have jumped on the marble bandwagon. However I knew that at some point decorations would no longer do. That eventually I would turn into a decor-obsessed monster. Well that day has come ladies and gentleman, and I knew I had to do something about it. No I will not be aimlessly wandering the streets of East London, rambling about marble and Pinterest tutorials to anyone who will listen. Instead I remembered something from my childhood – the old style marble contact paper/vinyl you could buy in homeware stores (que horrific memories of being dragged around B&Q by my parents). So I got on eBay and decided I would finally spruce up the table I use for my product photos…and here’s my resulting tutorial: How to create a marble table for under £20, in only 5 steps!

What do you need?
Table – I bought mine from Argos (£14.99)
Marble Contact Paper – eBay (£4.99)
Soft clean cloth
Scissors
Ruler

How to make it:
1. Clean the surface of the table.
2. Use the ruler to measure the diameter of the table.
3. Use the grid on the reverse of the contact paper to measure and cut to size.
4. Peel off some of the back paper and put it along one edge of the table.
5. Use the soft cloth to gently apply pressure to the paper. Slowly peel off the rest of the paper little by little, continuing to apply pressure as you go along.

The great thing about contact paper/vinyl is that you can always peel it off if you make a mistake (or if decide that you don’t like it). You could also use the leftover to cover your laptop or phone case…or anything else you can get your hands on.

Good luck!

diy-marble-table-tutorial-vinyl-contact-paper-bloomzy-4

diy-marble-table-tutorial-vinyl-contact-paper-bloomzy-3

diy-marble-table-tutorial-vinyl-contact-paper-bloomzy-2

diy-marble-table-tutorial-vinyl-contact-paper-bloomzy-1

diy-marble-table-tutorial-vinyl-contact-paper-bloomzy-8

diy-marble-table-tutorial-vinyl-contact-paper-bloomzy-6