Taste of The Côtes du Rhône | Masterchef Exose Grant’s Recipe

A taste of the Côtes du Rhône with Masterchef Exose Grant’s Rosé Poached Peach recipe

I’ve been bringing the Côtes du Rhône into my home for over a year now, through the beauty of wine and food. It’s been a welcome reminder of the South of France, and all of the delicious produce the area has to offer.

MasterChef finalist, Exose Grant has created two recipes, at home, that are inspired by and work well with Côtes du Rhône wine, reflecting just how accessible and high quality the wines are. I was challenged to replicate one of Chef Exose’s recipes – queue me running around a hot kitchen shouting “yes chef!” to myself.
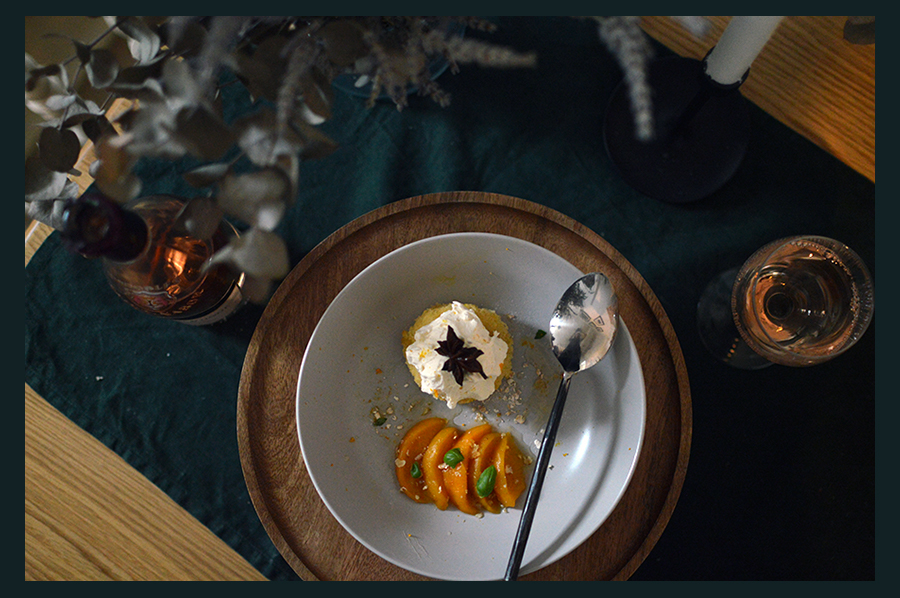
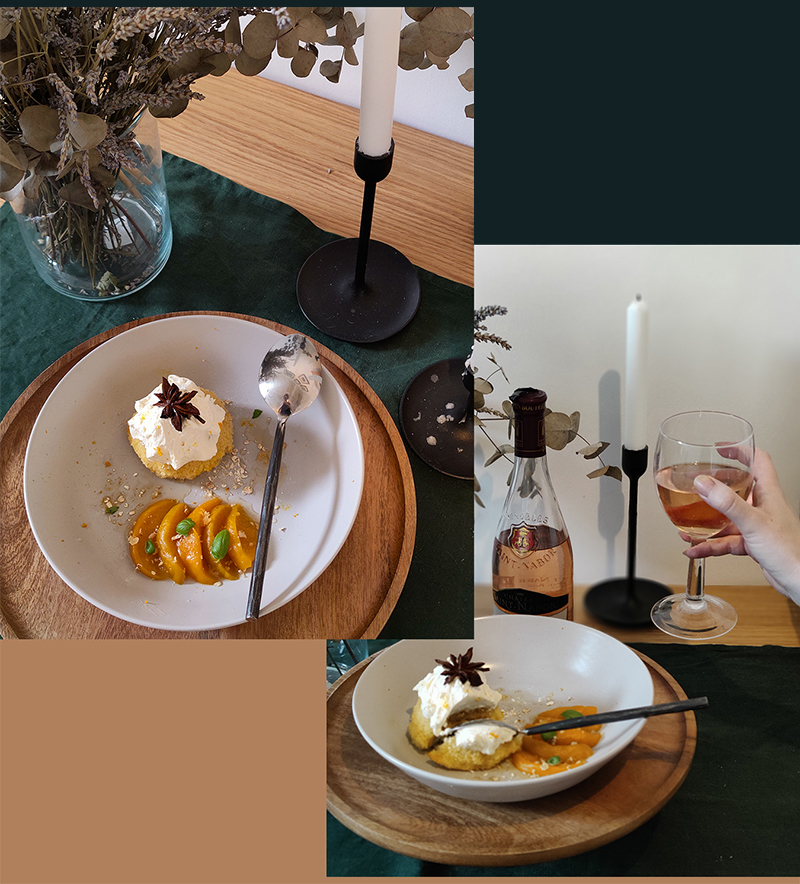
Rosé Poached Peach

I find cooking/baking incredibly relaxing & satisfying, and this was no different. I had such a wonderful time trying out a new recipe, with some of my favourite ingredients; peach, star anise and rosé. I added my own little twist to the final plated dish by soaking the cake in the syrup from the peaches, sprinkling orange peel onto the cream, and decorating with fresh herbs and star anise on top! I didn’t want to deviate from Chef Exose‘s amazing recipe, but I wanted to add my own flare to it – something I like to do whilst cooking/baking.

You can view the Rosé Poached Peach recipe that I created on Chef Exose’s Instagram, as well as a complimentary savoury main dish.

Taste of The Côtes du Rhône

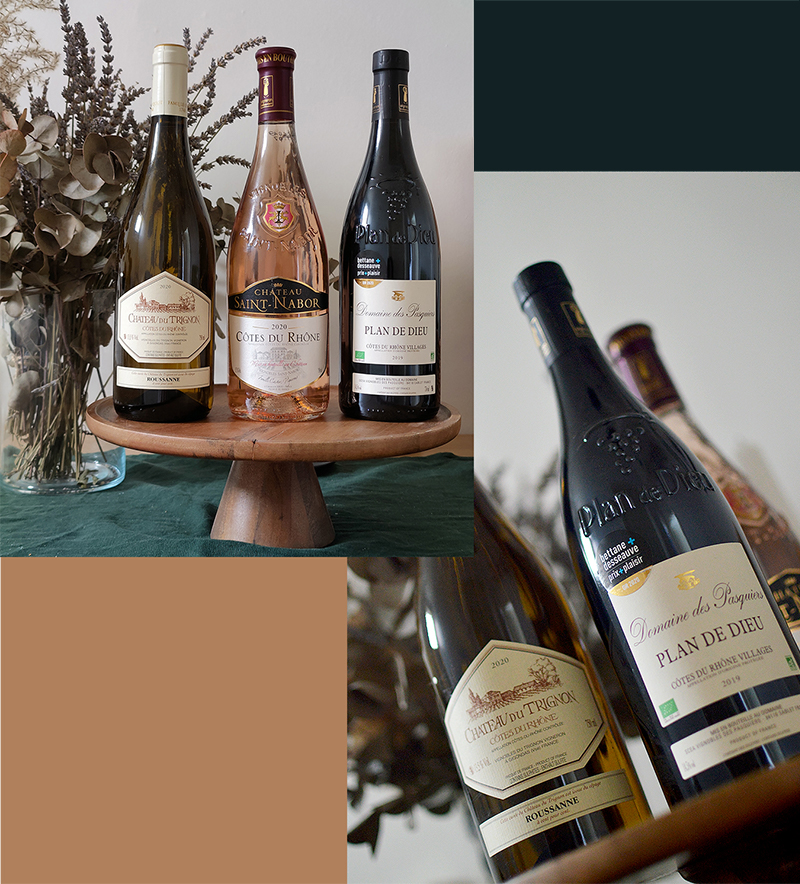
I love sharing food, so I made the dish for myself and my partner. He actually prefers red wine though, so he paired the dish with a Côtes du Rhône Plan de Dieu, whilst I had a glass of the Chateau Saint Nabor – the same rosé I used in the dish itself. Although it would equally go well with a white. If you hadn’t guessed it yet, all of the wines in this post are pretty versatile and suitable for most occasions and dishes. Perfect for a taste of the Côtes du Rhône.

You can find out more about Côtes du Rhône wines and where you can purchase them here.

Check out more of my lifestyle and food posts.

Three cote du rhone wine bottles stand on a wooden dish

Items were gifted by The Belleville Collective, however, all images, words and opinions are my own.

Recipe: Cauliflower Base Pizza (Gluten-Free)

Cauliflower base pizza is something I’ve been toying with the idea of for a while. I first heard about it when a friend told me she had tried her hand at a gluten-free pizza. After reading up on it I found out that all you needed was cauliflower and egg for the base, which excited me greatly, as I can be a bit lazy in the kitchen. So I figured I’d try my hand at it and see what I could come up with on my own. This recipe is completely gluten-free and can be adapted to best fit your personal tastes. It may sound outrageous, but this has now become my favourite kind of pizza. I would gladly choose it over a regular base any day. Sayonara Dominos! Hello gluten-free heaven!

As a reference, most of the seasoning for this is done to taste so I haven’t used any measurements.
I’ve also recommended some alternatives for those who don’t like spice.

Ingredients:
350g Cauliflower – Frozen or Fresh
50g Mozzarella (approx)
3 Baby Tomatoes
1 Large Egg
Pesto (approx. 1 1/2 tablespoons)
Chopped Spring Onions (approx. 2)
Chilli Powder/Paprika
Dried Basil & Oregano
Salt & Pepper
Garlic Clove/s
Parmesan
What you need to do…
Pre-heat your oven to 200c/Gas Mark 7, and line a tray with greaseproof paper.
If you use frozen cauliflower, I would suggest defrosting it/cooking it slightly and squeezing out any excess water. Fresh cauliflower is easier to work with, but I have used frozen in this recipe as it’s just easier to keep a big bag in the freezer. 
After you have prepared your cauliflower cook it in the microwave for 5mins.
Let it cool, then place it in the blender, along with the garlic (I used 2 cloves).
Blend this for about 10 seconds, making sure you are left with crumbs, and not a puree.
Add your cauliflower and garlic mixture to a large bowl. To this add the egg, salt & pepper, dried basil & oregano, parmesan and the chilli powder (or paprika if you’re not a fan of spice) – to taste. Mix this together with a large spoon until you are left with a dough like texture. If you think your mixture is a bit wet, you can always add a little gluten-free self raising flour to bulk it up.
Once you have your mixture ready, roll it into a ball and place it on your lined tray. Press down onto the ball and create a large circle, making sure not to thin it out too much – you want a thickish crust. Don’t worry if it looks a bit messy, the rustic charm will add to the look and texture of the base once it is cooked. Place your ‘dough’ in the oven for around 15mins. Sometimes I turn it around halfway through, to make sure it is cooked evenly. 
Now your base is cooked, you can garnish it! Spread the pesto evenly over the base – you can add a little tomato puree (gluten-free) here if you like. Cut your tomatoes into quarters and scatter them over the pizza. I like to scatter the chopped spring onions over top of this. Finally, break up your mozzarella and cover the pizza with it. 
Bake your pizza in the oven, for around 10mins, until it has browned and the mozzarella has melted.
Cut in half and serve – I like to have it with potatoes or a salad.
This is a super quick and easy recipe that anyone can enjoy – even if you’re not on a gluten-free diet. Trust me! It’s just as filling as a regular pizza, but has a lot less calories and isn’t anywhere near as greasy. It also includes 2 of your 7 a day! 
As always, if you do try it out, tweet me or leave a comment here as I’d love to know what you think!

Recipe: Vegan Mac & Cheese (Macaroni Cheese) – Gluten Free

First off, no I am not a vegan, but I appreciate vegan food. I eat a lot of gluten and dairy free food and I like vegetarian dishes. So when I first heard of vegan macaroni cheese I was very intrigued. I originally came across a recipe a few years ago, from a website that is now dead. Thankfully that doesn’t matter as I have made it so many times that I’ve personalised it. I prefer to use nutritional yeast for this recipe, as opposed to cashew nuts – so it’s nut allergy friendly. Nutritional yeast has a lovely nutty cheese flavour to it and is great for pretty much all diets. It’s nut-free, gluten-free, dairy-free and vegan friendly – so it’s suited to most people.
This is a quick and easy recipe that doesn’t take long, and tastes absolutely delicious. A lot of people on Twitter were asking me to post it, so here is my Vegan Mac & Cheese recipe!

For reference, I use cups as they’re easier.
Ingredients:
Paprika: 2 Teaspoons
Nutritional yeast: 1 Cup
Dijon mustard: 1 Teaspoon
Gluten-free Pasta: 3 Cups
Rice Milk (or any milk alternative): 1 Cup
Garlic: 1-2 Cloves (depending on personal taste)
Sunflower or Olive Oil (both work fine): 2/3 Cup
Tamari (Gluten-free Japanese soy sauce): 1/4 Cup

Put the nutritional yeast, paprika and garlic in the blender and mix to chop the garlic.
Add the mustard, oil, tamari and rice milk to the mixture. Blend the mixture for about 30 seconds.

After you’ve blended the mixture, cook your pasta in the saucepan. Whilst this is cooking pre-heat your oven to 180 degrees. It’s worth mentioning that I like to make the mixture in the morning and leave it in the fridge until the evening.  I find that the sauce seems to be a bit more flavoursome if you do this.
Once the pasta is cooked, pop it in a dish and pour over the mixture. You can optionally add gluten-free breadcrumbs to the top (or regular, if you aren’t on a GF diet). Make sure all of the pasta is covered with the sauce, and pop in the oven for around 20 minutes. Remove from the dish and serve!
This is one of my favourite recipes to make so I’m glad I could share it with you.
If you do have a go at making it, do let me know as I’d love to know what you think.