Where to Eat in London 3

a little bit of what you fancy | Dinner | Dalston | Website

– reservations available –
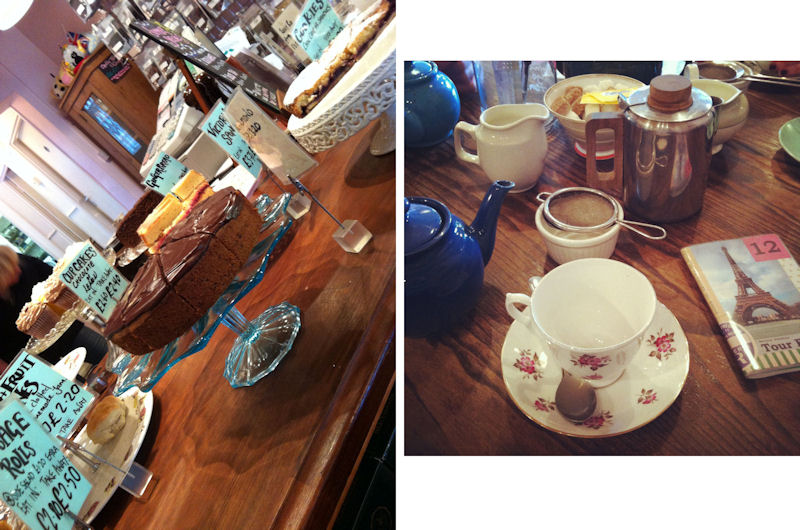
The Tea Rooms | Tea Room | Stoke Newington | Website
– reservations not available –

Las Iguanas | Bar/Dinner | Stratford Westfield | Website
–  reservations may be available  –

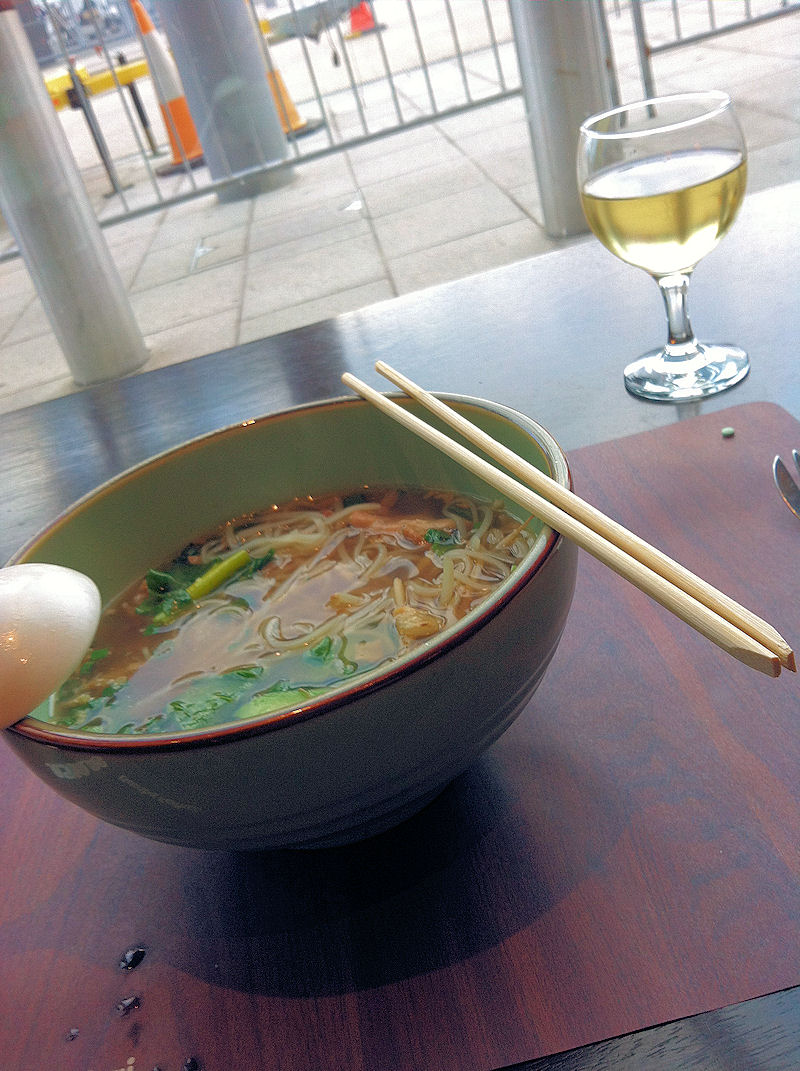
Busaba Eathai | Lunch/Dinner | Stratford Westfield | Website
– reservations available –

I’m a pretty big foodie, if you hadn’t already guessed, so I wanted to post a bit about food in London.
There are some amazing places to eat and pick up food, and these are just a few of the places I visited on my last trip.
Kind of like a Where to Eat in London – I have included the name, type of restaurant/cafe/store, the location of the place I visited, and a link to their website, as the bigger places have more than one location.

I had to split this series into what is now 3 posts (you can find the series here) as my love for food and discovering new bars, restaurants etc. continues to blossom. This time round all of the restaurants, apart from Busaba (I’ve now been to two of their locations – both wonderful) are all one offs – meaning they can’t be found in multiple locations in London. If you’re curious about what I ate feel free to ask but I didn’t write it as I think it’s self explanatory from most of the photos.

I wouldn’t have included these places if I didn’t love and recommend them.
So if you have the chance you should definitely check them out!

Tutorial: Studded Nail Art Design

How to create a simple studded nail art design

I love nail art but my patience is as long as my skills are good.
Therefore I tend to stick to simple, but effective designs and my favourite way to do this is with an ‘accent nail’.
An accent nail can be one or more nails that stand out from the rest to give your nails that extra bit of glam.
I tend to do one or two, but with this design I felt that less was more. 
So here is a simple & easy tutorial for a studded nail design:
What you will need:
1 x Base & Top Coat
1 x Nail Polish (in your choice of colour)
1 x Container of Micro-beads (in your choice of colour)

How to create the look:
1. Paint your nails with a base coat, your chosen colour and a top coat.
2. Pick your colour of Micro-beads and take a few out of the container.
3. Use the brush of your ‘top coat’ to pick up one of the Micro-beads
4. Place the beads on your finger nail in a random design.
5. Once the beads have been put in place, place a top coat over the nail.
And that’s it!
Of course you can use a separate tool for placing the beads on but I was trying to keep the tutorial simple, with items that most people have or are easily accessible. You could also do it on all of the nails, which I think looks great. 
An edgy design that doesn’t take long to create and still looks chic, and as if you spent a lot of time on your nails.
The nail polish I am wearing is Essie in Stone, and the Micro-beads were provided by Born Pretty Store*.
You can buy the nail polish here and the Micro-beads here (use code: BLOOMZYK31 for 10% discount).

Topshop Mini Haul – Keeping it British

A few purchases from Topshop that I made recently

Yesterday I was lucky enough to receive a giftcard for Topshop, and guess what?
Yep, I pretty much spent it within an hour of being given it – shame on me! Actually there have been a few things I’ve wanted to purchase from Topshop recently, but managed to resist. You can imagine that this giftcard was a very welcome addition to my purse…even if it didn’t stay there for too long.
So what did I buy?
I’ve had my eye on the Jersey Skirt for a few weeks, after trying it on and posting this photo on Instagram.
It’s a perfectly simple yet essential addition to my wardrobe this A/W, and I’m sure I’ll have fun coordinating it.
The pork pie hat is a welcome addition to my hat collection, and it feels quite British – don’t you think?
As for the studded phone case…well I’m not even sure if it will fit my iPhone 4 but I liked the look of it and…studs!!
Have you treated yourself/been treated recently?

Review: John Frieda Frizz Ease 3 Day Straight

Trying to keep hair straight (after a blow dry/using straighteners) can be quite difficult.
Myself and my mother included both straighten our hair and whereas mine usually keeps for a day or two, my mum (who works most of the day) finds that her hair can kink up easily – especially when it’s warm weather.
So the idea of John Frieda’s Frizz Ease 3 Day Straight spray is a saviour to people like us with curly, out of control hair.
After reading reviews online I knew it might be hit or miss.
Some people thought it was a miracle products and others said they showed no results.
I decided to test it out on my mum who has short, thick hair that kinks easily – especially at the ends.
Why my mum and not me? Out of the two of us, she has a lot more trouble keeping her hair straight. 
It was also kind of fun having a willing victim testee who I could really see the results on.
This was my mum’s hair after applying the spray to towel dried hair, a blow dry and straightening. 
It’s definitely worth mentioning that my mum’s hair has never been so straight! The spray performed absolutely wonderfully on her hair and not only did it keep it straight, it looked super glossy too. So the big question – did it stay straight for 3 days? Well…yes it did! In fact I didn’t even bother taking an ‘after’ photo as it looked exactly the same. It didn’t kink up after 2 days work, and she was so in love with it she was raving the whole time about how wonderful it is.
My mum’s verdict? 10/10 – would definitely buy!
My verdict? For only £6.99 this is a must have for anyone who has trouble with keeping their hair straight.

You can buy John Frieda’s 3 Day Straight Styling Spray from Boots.
They also currently have a 3 for 2 offer in Boots, so make the most of it!

Introducing: Shopcade

A preview of my Shopcade page
Shopcade is a new way to keep track of the things you love and the items you want to buy.
As you all know I am a wishlist addict. I love compiling them and sharing them with everyone else.
So it’s only natural for me that Shopcade is a site that is not only fun but essential for me when I’m online.
Shopcade is a social shopping application that allows you to share the items you’re buying or just want to buy.
You have your own personal page where you can add products and lists of items to show off to your friends and the Shopcade community. If you have ever seen a photo of an item online and wondered where it’s from and how you can buy it – Shopcade is your saviour! You can click through the product and be taken directly to the brands page where you can buy the item and earn points (& cash!) on Shopcade. You can also just earn points by adding products to your page. Once you have a certain amount you can use your points to get free gifts or vouchers. I used my points to get myself some new business cards and I’m currently saving the rest for a big prize!
I personally was drawn to Shopcade through the product sharing/list creating, and by the idea that you can then buy the item you just re-blogged/pinned. Earning points and cash whilst doing this is just an extra perk for me really. 
I also don’t feel any pressure to buy items – I can just enjoy sharing products and making my page pretty.
Add me on Shopcade here, and check out my Shopcade feature here.
Please ignore the name, it’s old and is in the process of being changed.

Photo Diary: A Catch Up

Click image to enlarge
I know that most people aren’t fans of Instagram posts so I do apologise.
I’ve been so busy the past week that I haven’t had any time to sit down and write, even though I have a ton of ideas and posts that I want to get up and show you all. Alas, for now they shall remain in my head.
I went to London this week and whilst I was only there for a couple of days I had a nice time.
I shared some photos whilst I was there and I included a couple above, as well as some from the last few weeks.
I guess really that I just wanted to keep you all updated (as much as I could) and let you know that I haven’t forgotten about the blog. As you can see I’ve not changed much, nor has my obsession with food and pretty things.
My unofficial hiatus won’t last too long though – I promise to be back asap!

Giveaway: Rekorderlig Premium Fruit Cider


When I was contacted recently about a possible giveaway collaboration with Rekorderlig I couldn’t say no!
My love for pretty much everything Swedish was one of the main factors, but I also knew from experience that this is one delicious beverage. I’m not a fan of regular cider, but Rekorderlig’s fruit ciders really are something different all together – they’re packed full of flavour…and there’s so many to choose from!
Rekorderlig is a premium fruit cider from Sweden, which has become pretty popular in the UK since its release.
It comes in a large array of flavours (even more than those pictured), which is rare, but wonderful for a fruit cider.
I’ve had quite a few people asking me about it from my Instagram photos and tweets, so I hope you’ll all love this giveaway.
What can you win?
I have 3 cases to giveaway, to 3 lucky winners!
The winner will be able to choose which flavour they receive.

How to enter:
+ Be a follower of ‘Bloomzy’ via GFC/Bloglovin
+ Earn extra entries via Twitter & Facebook
+ Leave a comment letting us know your dream flavour of cider – mine would be cinnamon spice!
As this giveaway is for an alcoholic beverage please read the terms and conditions:

– You must be 18 or over to enter.
– The giveaway is open UK residents only – sorry.
– Winners are required to send photo ID proof of age (passport or driving license) via email.

This giveaway has now closed!
And the winners are:

a Rafflecopter giveaway