Photo Diary: Life in London

Recent snaps from my Instagram – @bloomzy

I have now been living in London for just over a month.
It’s been wonderful and I’m sorry I haven’t been able to share more with you.
I’ve missed doing lifestyle posts and a few of you mentioned you missed them too, so here’s two in a row!
The reason why I have been so busy is because I found a job a few weeks ago so I’ve been working.
Apart from work, I’ve also been indulging in some tasty food, as yesterday’s post proves.
My BFF Jemi visited and we had a bit of retail therapy as well as a good catch-up – miss you already!
I’ve also been indulging in tasty clothes too, such as a new pair of wedge sneakers and the Tatty Devine Frida Kahlo necklace that I had been lusting after for several months. Luckily my job allows me to wear all the fancy clothes I like! 
I don’t have as much free time as I would like now, but I still enjoy my job and the free time I get.
How do you relax and make the most of your free time?

New Season: elf Cosmetics

 A selection of new products from e.l.f cosmetics*
A couple of weeks ago the lovely people from e.l.f sent me some of their new products to try. I was so excited when I opened the package and found a very Christmas-y gift bag loaded with items. It feels as though e.l.f know me personally and the items that would be perfectly matched to me.
e.l.f are an American cosmetic company who launched in the UK back in 2007. They are an affordable alternative to high street retailers, with items starting for as little as £1.50. Unfortunately they are on only available online in the UK but you can easily purchase items through their site.
What did they send me?
– Mysterious Nail Polish Set –
The nail polish set isn’t up on the site yet, but hopefully it will be added soon as the colours are amazing! As for the rest of the items, well I can’t wait to try them out, especially the blush brush and marble eyeshadows. I also got quite excited when I saw the mascara shield as I’m always trying so hard not to smudge my mascara. This is only a sneak peek but I plan to do reviews of some of the products after I’ve tried them out. I’ve never tried the brand myself so I’m excited to give them a go with these products!

MUA Cosmetics ‘Berry’ Haul

MUA Cosmetics Berry Themed Haul

Slowly the word ‘haul’ is growing on me, though I feel out of necessity more than love.
Anyway, I feel it suits these kind of posts where I’d just be saying ‘a bunch of stuff I bought from MUA’ instead.
Some of you may know that recently MUA hit 35,000 likes on Facebook and with every 5,000 likes they do a promotion.
This time the promotion was 35% off and free shipping – that’s absolutely amazing, right?
What did I buy?
Brow Kit
You probably noticed already that there is a general theme here. I love the current berry trend especially worn on the lips, so I choose a couple of lipsticks and glosses, as well as some nail polishes to go along with the trend. I had wanted to buy a bunch of stuff from MUA but I decided to wait until they had another promotion. I’m so glad I did because I was able to grab everything I wanted, and more! I’m really happy with all the items. 
That’s £14 worth of products for only £9.10, with free shipping – bargain!

Discuss: Would you rent a nail polish?
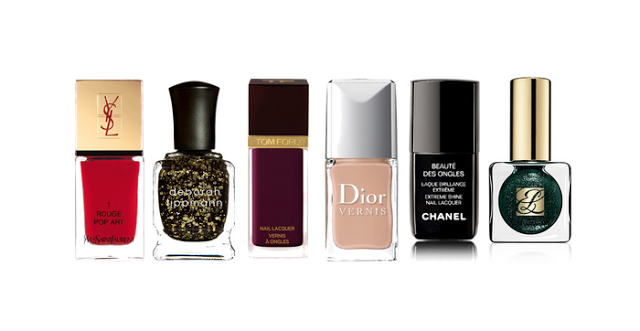

Most nail polish addicts will have a favourite designer brand. However most of these brands are expensive, even if the quality is good. So what if someone told you, you could have designer nail polishes but without the price tag? Well that’s exactly what US brand Lacquerous are planning to offer.

The concept behind the brand is simple; You pay $18 a month and they send you 3 designer nail polishes (of your choice)The catch? You’re only renting them. Yep, at the end of the month you send the polishes back. You then pay another $18 and are sent another 3 polishes, and so on. They’re the “Netflix for Nail Polish”.

This all sounds great, especially if you don’t use a polish more than once a week, and switch often. However the small print is where it starts to sound a little less likeable – you can only use each polish up to 3 times. Now for me, that’s a big no no. If I was going to pay £12 a month (the equivalent to $18) for 3 polishes a month I would want to get my moneys worth, designer or not. Sure most people probably won’t even use them more than 3 times, but what if you happen to dislike the other colours you choose, or you really fall for one or two in particular?

At the moment the company is invite-only to American citizens, with no talk of taking the venture overseas. They say they have over 2,500 people on their waiting list, however when you think about the size of America…well that’s not much at all, is it? I guess only time will tell as to how popular the idea and company will be.

Would you rent a nail polish? What do you think of the idea behind Lacquerous?

Source; 1, 2

Photo Diary: Nail Art

A selection of my recent nail art / nail polish looks
 
One thing I always post on my Instagram is nail art photos.
I don’t do it very often on my blog though, unless I’m posting a tutorial.
So I thought it was about time that I showed off some of my recent nail art/nail polish looks.
Red Gloss & Glitter MixMaxfactor Red Passion & Barry M #np150
Halloween Black & Orange Glitter Gradient Barry M #np147 & bornprettystore glitter pen
Holographic17 holo nail Silver
Black & Gold StudsBarry M #np147, Barry M #np289 & Models Own champagne
Gold ‘Caviar’ Models Own champagne & bornprettystore micro-beads
Black & Gold Studded Barry M #np147 & bornprettystore micro-beads
As you can see I’ve really been favouring glitter polishes again, as well as using studs (micro-beads).
I try to make time to do my nails at least once a week, however sometimes it’s once a fortnight.
I have so many polishes that I would change them more often if I could, but I try to stick with a design.
Do you make time to do your nails every week?
Which one of my recent nail looks is your favourite?

Ted Baker Duo Nail Sets

Now Ted Baker isn’t the first brand I think of going to when I want a new polish.
However these beauties have really caught my eye and changed my opinion on that.
The new Ted Baker Duo Nail Sets come with 2 bottles of polish; a base shade and complimentary glitter shade.
There are 3 sets in the series and although that may not seem like much good ol’ Ted has pretty much covered all the bases. There’s pink, gold and blue to choose between, which I imagine will please most people.
These will easily suit nail polish fans or fans of nail art, as it’s always useful to have a complimentary shade on hand.
I love this idea and I already want to grab a couple of the sets to create a glittery gradient nail.
The blue set has to be my favourite, but I also love the gold. I’m not a fan of pink though so I probably won’t grab that one, although I know plenty of people who will love it. I would personally have liked to see a purple in there too, so here’s hoping these are popular and we see more colours in the future!
Even though these are great for the festive season, you don’t have to worry, they’re not just for Christmas.
You can find them in Boots stores nationwide, and selected Ted Baker stores.
The polishes retail at £8.50 for the set of two.

Tutorial: Velvet Nail Manicure

How to create an on-trend velvet nail manicure

The last nail tutorial I posted seemed quite successful so I thought I would do another. This time I picked this season’s on-trend velvet nail manicure – made popular on the catwalk. Once again I’m going for the accent nail as I didn’t want to over do it. So here is a simple and easy tutorial for a velvet manicure.

You will need…
1 x Brush
1 x Tweezers
1 x Base Coat (optional)
1 x Nail Polish (in your choice of colour)
1 x Pot of  ‘Velvet’ Powder (in your choice of colour)

How to create the look:
1. If you’ve chosen to use a base coat, apply it to your nails.
2. Take your chosen nail polish and apply a coat to your nails – wait til dry.
3. Take the ‘velvet’ powder and use the tweezers to mix and separate the powder.
4. Apply another coat of polish on your chosen nails and then shake the powder onto the nails.
4. Leave the powder to set and the polish to dry, then use the brush to brush off any excess powder.
5. A top coat is not needed as it would ruin the effect, and the powder will stay on without it.

And that’s it! As always these are just simple, easy steps that you can use as a guideline when creating this effect. You can always mix it up a bit – maybe do all your nails or even try and create a design with the powder. I would recommend laying down some paper to catch the excess powder – it also makes it easier to put back after. Don’t worry if you get it wet, it may look soggy and ruined but after a quick dry it’s back to normal. This is a very subtle type of nail art, especially in such a dark colour, but I really like it.

The nail polish I am wearing is Natural Collection’s ‘Cosmic Crush’, and the Velvet Flocking Powder* was provided by Born Pretty Store – the tweezers and brush are included with all sales of the (separate) powder.

You can buy the nail polish in Boots and the Powder here (use code: BLOOMZYK31 for 10% discount).