Review: Playboy Lipstick in Playmate

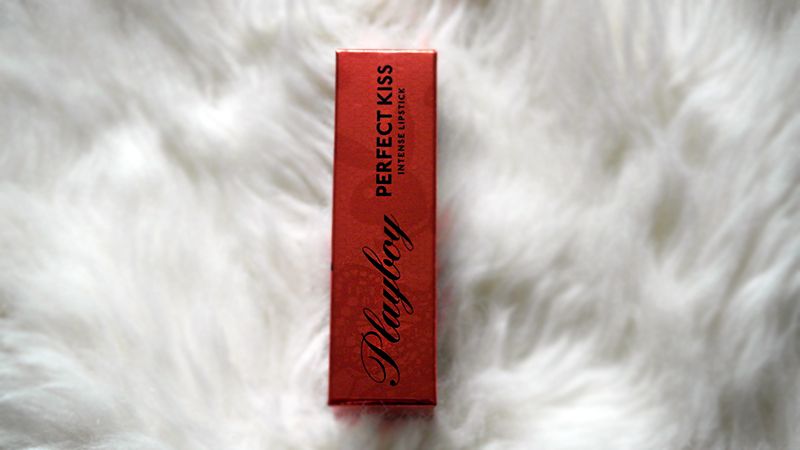
Playboy would not be the first brand to pop into my mind when I think of make-up. However they recently challenged that idea and have released their own cosmetic line. The capsule collection consists of lipstick, bronzer, nail polish, liquid liner and more. I reviewed their liquid liner, and now I’m reviewing their lipstick.
Swatched on hand in natural light, and on lips in artificial light.
Pros:
+ Highly pigmented
+ Creamy texture
+ Applies easily

Cons:
– Slight transfer when eating/drinking
– Shade isn’t suited to my skin tone
– Scent doesn’t appeal to me

Notes:
I was pretty excited by this shade when I first saw it – it looked like an affordable dupe for Lime Crime’s Great Pink Planet lipstick. After swatching it, I was convinced. The lipstick is highly pigmented and has a creamy texture that makes it easy to apply, and it isn’t drying. I was very impressed with the pigmentation on this as so many lipsticks get it wrong. So for a new brand to bring out something like this, it’s impressive. Unfortunately after applying it I realised the shade isn’t suited to my pale skin tone, which is a shame. I still really love this colour though. It does transfer when eating/drinking, but not as much as some lipsticks I’ve worn. It’s still annoying, but at least you won’t be left completely bare lipped afterwards. As for the scent, I can’t quite pin it down as it’s quite generic, but I dislike my lipsticks having a scent so it doesn’t really matter anyway – it’s nothing personal against this brand. I’m on the fence about this lipstick as I love the pigmentation, the texture and I can appreciate the shade, however I wouldn’t purchase it as it just doesn’t suit me. These lipsticks rrp at £7.95 which isn’t too bad, and I would be tempted to buy another shade, however there is currently a sale on at Direct Cosmetics, and the lipsticks are now only £3.95 – bargain!
You can purchase Playboy Lipstick in Playmate at Direct Cosmetics.

Tutorial: Velvet Nail Manicure

How to create an on-trend velvet nail manicure

The last nail tutorial I posted seemed quite successful so I thought I would do another. This time I picked this season’s on-trend velvet nail manicure – made popular on the catwalk. Once again I’m going for the accent nail as I didn’t want to over do it. So here is a simple and easy tutorial for a velvet manicure.

You will need…
1 x Brush
1 x Tweezers
1 x Base Coat (optional)
1 x Nail Polish (in your choice of colour)
1 x Pot of  ‘Velvet’ Powder (in your choice of colour)

How to create the look:
1. If you’ve chosen to use a base coat, apply it to your nails.
2. Take your chosen nail polish and apply a coat to your nails – wait til dry.
3. Take the ‘velvet’ powder and use the tweezers to mix and separate the powder.
4. Apply another coat of polish on your chosen nails and then shake the powder onto the nails.
4. Leave the powder to set and the polish to dry, then use the brush to brush off any excess powder.
5. A top coat is not needed as it would ruin the effect, and the powder will stay on without it.

And that’s it! As always these are just simple, easy steps that you can use as a guideline when creating this effect. You can always mix it up a bit – maybe do all your nails or even try and create a design with the powder. I would recommend laying down some paper to catch the excess powder – it also makes it easier to put back after. Don’t worry if you get it wet, it may look soggy and ruined but after a quick dry it’s back to normal. This is a very subtle type of nail art, especially in such a dark colour, but I really like it.

The nail polish I am wearing is Natural Collection’s ‘Cosmic Crush’, and the Velvet Flocking Powder* was provided by Born Pretty Store – the tweezers and brush are included with all sales of the (separate) powder.

You can buy the nail polish in Boots and the Powder here (use code: BLOOMZYK31 for 10% discount).

Dupe: MUA Undressed vs. UD Naked Palette

MUA Undressed Palette & Urban Decay Naked Palette
I love seeing dupe posts on beauty blogs, and I recently acquired MUA’s Undressed palette, 
which is supposedly a dupe of Urban Decay’s Naked palette, so I thought I would do my own. 
From the start it’s easy to see where MUA got their inspiration from.
With Urban Decay’s palette at almost 10x the price (£36) of MUA’s (£4), I was certainly curious. 
After putting the two palettes side-by-side I was shocked and also a little amused at how similar the shades are.
True, MUA’s palette does not look as ‘high end’ as Urban Decay’s but it’s simple and clean – it also comes with a double ended applicator, but no primer unlike UD – although MUA’s primer is only £1.50.
Also, the UD palette is heavier, and not as easy to transport as MUA’s.
Anyway, onto the reason why you’re all here…
The following swatches come courtesy of my fiancé who allowed me to use his forearm as a model.
MUA’s £1.50 eyeshadow primer was used as a base before applying these.
Top row: MUA Undressed Palette
Bottom row: Urban Decay Naked Palette
The proof is in the picture.
Honestly, apart from a couple of the matte browns, the MUA shadows are pretty much identical.
A primer is needed with the MUA shades, but I don’t think anyone would expect anything else from a £4 palette.
I am incredibly impressed with how similar these are, and with previous experience with MUA palettes they are definitely worth the money. When used with a primer, they are long lasting and the colour stays as clear and fresh as when you first applied it. Both palettes have some amazing colours, perfect for this seasons nude make-up trends.

Final decision: This is an amazing dupe, and I would definitely use the MUA palette as a replacement for my UD one.
MUA Undressed Palette is available in Superdrug stores, and online here (worldwide shipping available).
Urban Decay’s Naked Palette is available in Debenhams & House of Fraser (UK) stores, and online here.